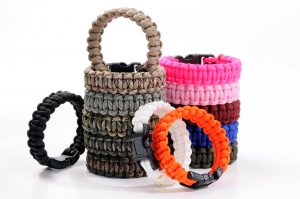
Paracord happens to be an extremely versatile item that offers a variety of uses. From making a strong fishing-line to replacing a shoe string that is broken, it offers an extensive array of uses that are handy for both wilderness scenarios or day-to-day situations. Here is a step by step guide on how to make a paracord bracelet.
 Materials
- 1/8-inch diameter paracord in one or more colors, with the length determined by the measurement of the wrist.
- ¾-inch side release plastic buckle.
1-inch of the bracelet length is equivalent to 12 inches or 1 foot of the cord required. For example, if the circumference of the wrist is 8-inches, then measure out 96-inches or 8-feet of cord.
- Tools
- Lighter
- Tape measure
- Scissors
Directions On How To Make A Paracord Bracelet
- Choose 1 or 2 colors to make the bracelet. These instructions include 2 colors.
- Measure the wrist by wrapping the paracord length around the wrist, making a note where the end part reaches the cord. Measure the length with a tape measure.
- Measure The Cord – When using 2 colors multiply this measurement by 6. This is the calculation that provides the total inches needed for the cords length. Add an additional 6-inches to ensure there is enough.
- Attach The Paracord To The Buckle – Fuse the ends of each color of paracord together using a lighter. To attach the paracord to 1 side of the buckle end use the girth hitch. First find the middle of the length of the paracord by holding the ends together and finding the center of the loop on the other side. Now thread this loop through one end on the buckle making sure it sticks out by an inch. Now thread each loose end through this loop pulling the cord snugly against the plastic buckle.
- Decide On The Length Of The Bracelet – Thread the loose ends of the paracord through the other side of the buckle piece. Measure the distance from 1 buckle to the next, positioning the free-buckle so that the length of the bracelet is equivalent to the wrist measurement adding an extra inch to ensure a more comfortable fit.
- Weaving The Main Bracelet – The next step involves weaving the bracelet’s body using a cobra-stitch. This involves taking the left-hand cord and then threading it behind the middle strands. Now cross this cord over the top of the right-hand cord. Now take the right-hand cord and again cross over the middle strands, taking it through a loop that was made by the left-hand cord. Make sure the cords are tight. Repeat this weave, making sure to alternate the sides until reaching the other side of the buckle.
- The Last Step – On completing the bracelet’s body, trim each end of the left over cord to around 1/2 inch. Burn the ends and press them into the cords of the bracelet to position them into place. Use pliers or the lighter to secure the cord and to avoid burns.
